About Veritas Cluster Server

About Veritas Cluster Server

We will start to learn About Veritas Cluster Server and how to manage it, in this post.

VCS is Symantec product and it connects single, multiple nodes under a framework to provide increased availability.

All the nodes will run using their own operating system.

VCS will connect the hardware’s using intelligent software to provide failover, load balancing, and control. when the monitored node or application failed, it will invoke another node or application which is hosted on a node within the cluster.


Reference: Symantec

RedHat Enterprise Linux 7 Installation

Will start learning RedHat Enterprise Linux 7 Installation in this post.

We have many new features in RHEL7 and simple differences in installation as well comparing to old version’s that we were given input like hostname, timezone, package selection, network configuration, kdump configuration, etc… in next next screen’s. But, in RHEL7 we can provide those details on a single screen. However all the remaining will be the same.

Using RHEL7 media boot the machine and you will receive a screen like below.

RedHat Enterprise Linux 7 Installation

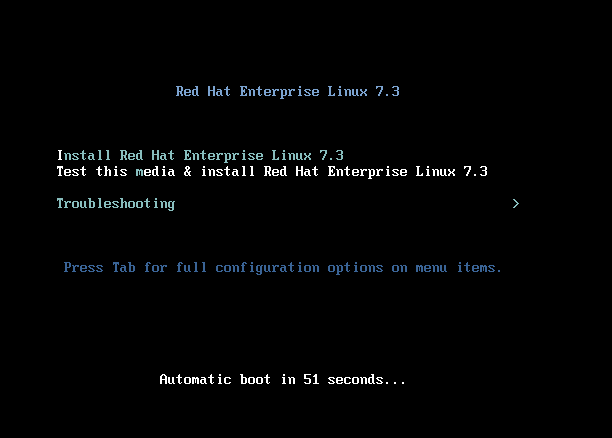
Now select “Install Red Hat Enterprise Linux 7.3” to begin the installation.

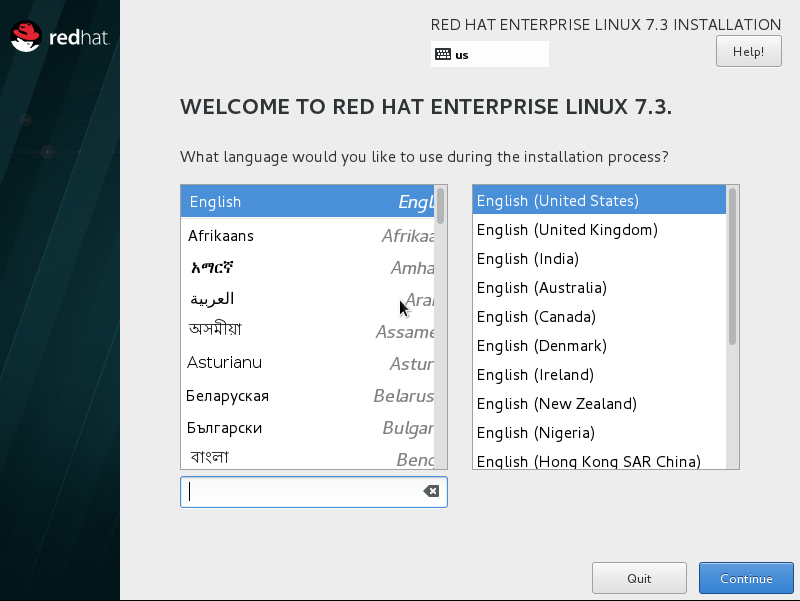
As first part, you will get a screen that is asking you to select the System language and keyboard layout like below.

Then next you will get a screen which is the place to provide all information to install the operating system.

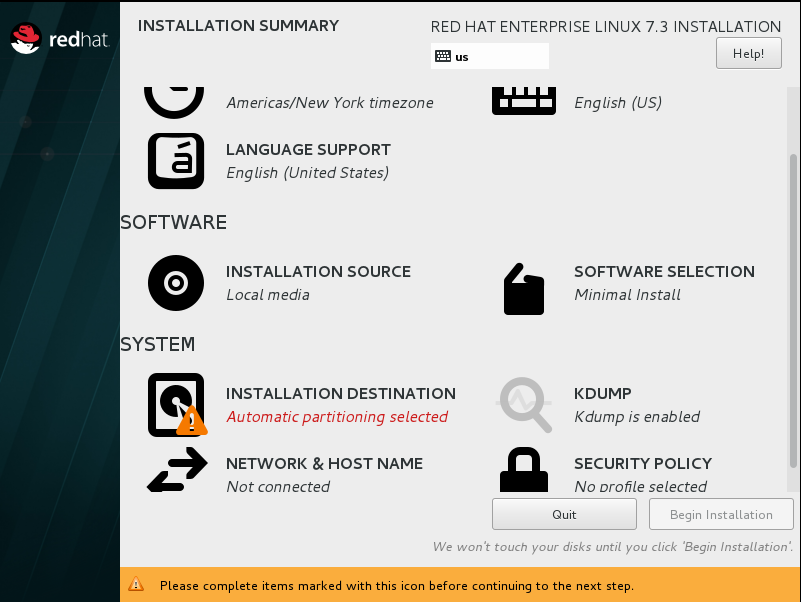
In this screen, you can provide all the information like Software selection, Partitioning in Installation destination tab, time zone, etc…

Now, will edit some of the configuration based on our requirement.

As first, here editing time zone part and selecting Asia/ Kolkata like below.

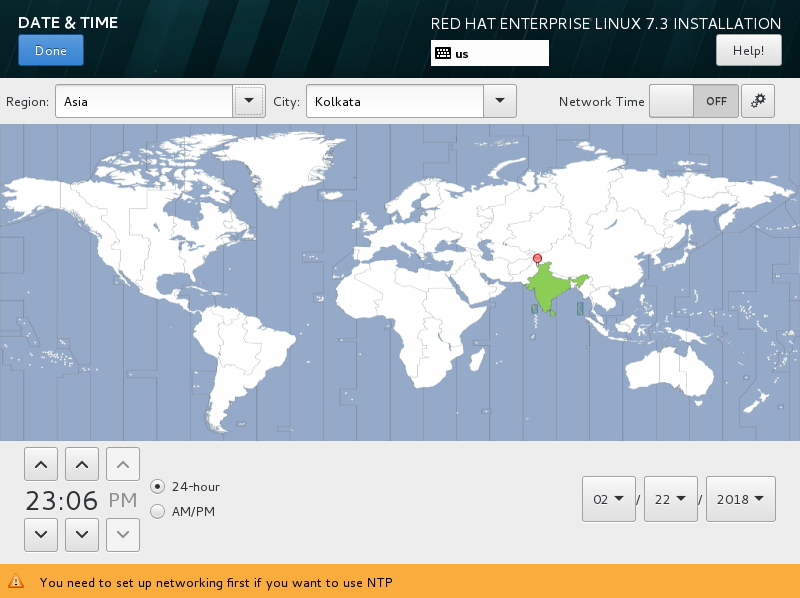
you can select the time zone in two ways one is by clicking on India over the map and another one is selecting Asia and Kolkata in the drop-down list.

And, click on the done button which is showing the left corner of upper on the screen to complete this part.

Likewise, we should click on done for each and every part.

Now, Click on “Software selection” tab to select packages

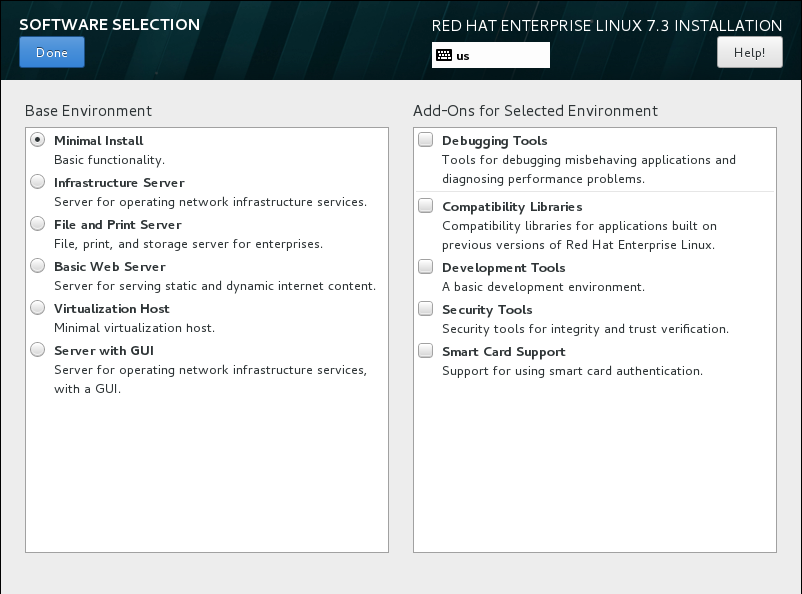
Will continue with default one which is “minimal installation”.

Based on the selected packages group, it will install the required packages.

Next, Click on “Installation destination” to create partitions.

We have two option at this stage. One is “Automatically configure partitions” and another one is “I will configure partitioning”

If you select the first option, it will create the partition automatically with LVM and if you select the second option, we need to provide the partition details manually.

Here let us see how to create manual partitions.

Once you selected the second option, you will get a screen asking for partition type Standard, LVM, etc…

select on Standard one to create a normal partition.

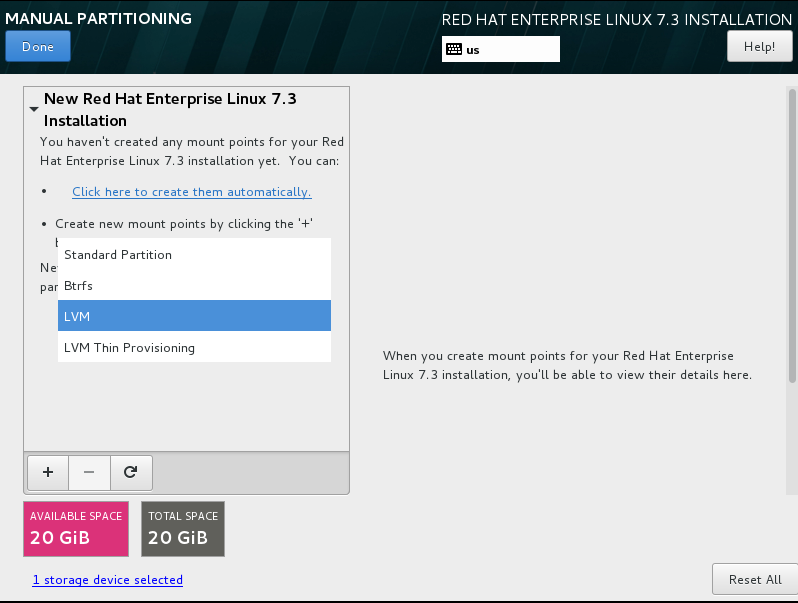
and click done to go next screen of partition creation.

It will ask for the mount point with size like below. Below filesystem, creation is compulsory while doing manual partitioning.

  1. boot – Contains bootloader and partition information
  2. / (root)
  3. swap – Virtual memory

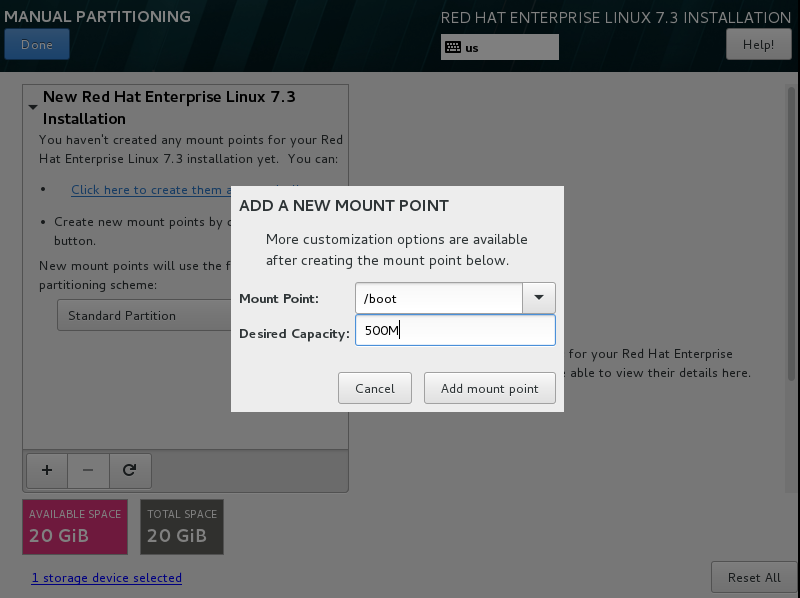
Like above will create the three mandate partition to continue the installation.

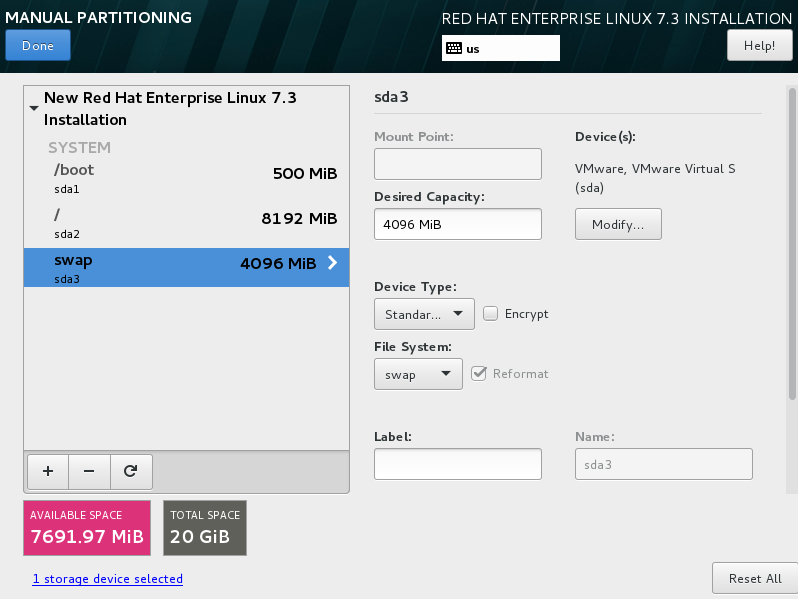
and click done to go back to the main screen.

and it will ask our confirmation to write the partition changes on the disk. Click “Accept Changes”.

And now, click “Begin Installation” to start the package installation.

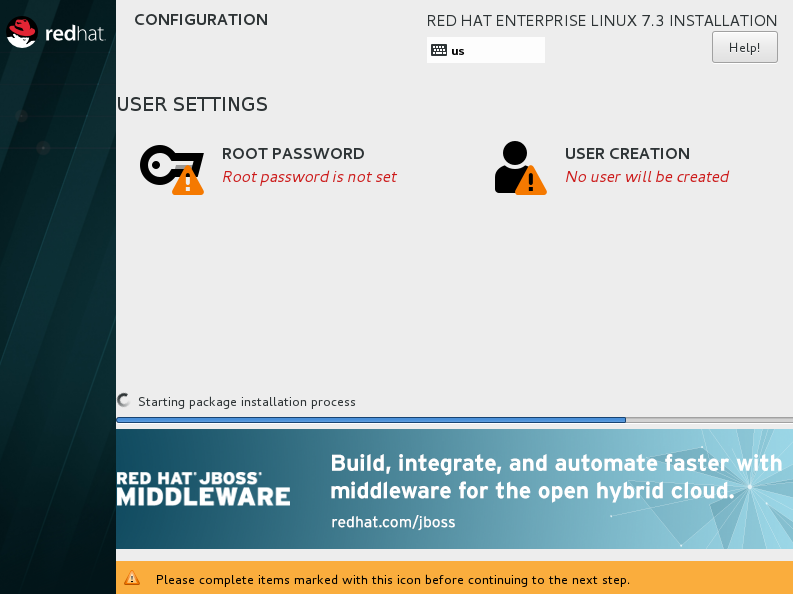
In package installation screen, we can see that password has not been set still. So, click on “Root Password” to set the root password. and click done.

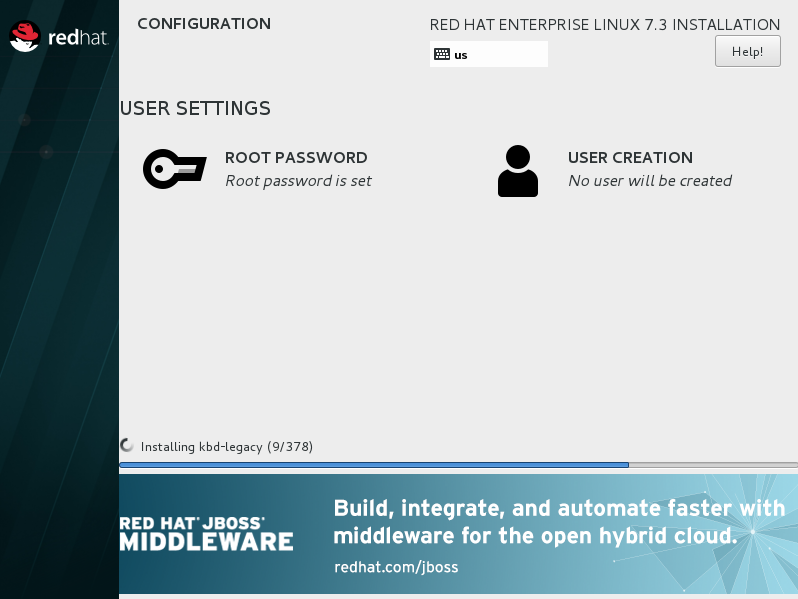
See the screen after root password has been assigned.

Once installation completed, will ask for the reboot. Click on “Reboot” button to complete the installation.

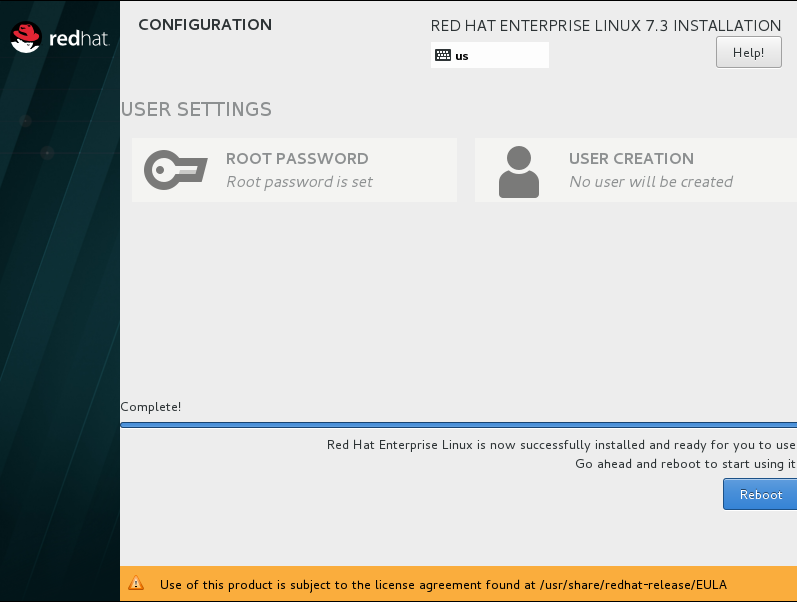
We compeleted RHEL7 installation successfully.


How to boot with an old kernel version in RHEL7

In this post, will see how to boot with an old kernel version in RHEL7. When the updated kernel not suitable for your application or OS not booting.

There might be a requirement to upgrade the operating system or kernel version alone in Linux/Unix machines.

In such case, we might face issue with the upgraded kernel version. To, fix that, follow the below steps.

By default, /etc/default/grub file has entry called GRUB_DEFAULT=saved.

[root@localhost ~]# cat /etc/default/grub
GRUB_TIMEOUT=5
GRUB_DISTRIBUTOR="$(sed 's, release .*$,,g' /etc/system-release)"
GRUB_DEFAULT=saved
GRUB_DISABLE_SUBMENU=true
GRUB_TERMINAL_OUTPUT="console"
GRUB_CMDLINE_LINUX="crashkernel=auto rhgb quiet"
GRUB_DISABLE_RECOVERY="true"

This entry instructs the system which kernel will be used to load the operating system by checking the saved_entry in the grubenv file, which is in /boot/grub2/grubenv.

[root@localhost ~]# cat /boot/grub2/grubenv
# GRUB Environment Block
saved_entry=0
#########################################################################################################################################################################################################################################################################################################################################################################################################################################################################################################################################################################################################################################################################################################################################################################################################################################################################################################################################################################################################################[root@localhost ~]#

So we can set the default kernel by editing /boot/grub2/grubenv file or using grub2-set-default command.

To do this, select the old kernel to boot the operating system from grub splash screen.

How to boot with old kernel in RHEL7

And use the grub2-set-default command to change the kernel.

Before changing we should remember that, the always updated kernel will be on top and will use numeric value “0” to mention this kernel in command

The old one will be available by next. So, to mention the old kernel will use numeric value “1”. Like this numeric will start from 0.

/boot/grub2/grub.cfg file contains Kernel and initramfs image details.

below command will show us the list of the kernel installed on this machine.

[root@localhost ~]# awk -F\' '$1=="menuentry " {print $2}' /etc/grub2.cfg
Red Hat Enterprise Linux Server (3.10.0-693.17.1.el7.x86_64) 7.3 (Maipo)
Red Hat Enterprise Linux Server (3.10.0-514.el7.x86_64) 7.3 (Maipo)
Red Hat Enterprise Linux Server (0-rescue-ffc8e857b7b84166b88e7b0522c168a4) 7.3 (Maipo)

By default, saved_entry will be the latest one, which you updated.

Using below command will change the default kernel as the old one to boot the operating system without any issue.

[root@localhost ~]# grub2-set-default 1

and now check again in /boot/grub2/grunenv file to verify the default kernel.

[root@localhost ~]# cat /boot/grub2/grubenv | grep saved
saved_entry=1

Now you can see in above screen that the old kernel is set as default one.

Now rebuild the /boot/grub2/grub.cfg file using grub2-mkconfig -o command.

Use the below command in BIOS based machines:

[root@localhost ~]# grub2-mkconfig -o /boot/grub2/grub.cfg
Generating grub configuration file ...
Found linux image: /boot/vmlinuz-3.10.0-693.17.1.el7.x86_64
Found initrd image: /boot/initramfs-3.10.0-693.17.1.el7.x86_64.img
Found linux image: /boot/vmlinuz-3.10.0-514.el7.x86_64
Found initrd image: /boot/initramfs-3.10.0-514.el7.x86_64.img
Found linux image: /boot/vmlinuz-0-rescue-ffc8e857b7b84166b88e7b0522c168a4
Found initrd image: /boot/initramfs-0-rescue-ffc8e857b7b84166b88e7b0522c168a4.img
done

Use below command for UEFI based machines:

[root@localhost ~]# grub2-mkconfig -o /boot/efi/EFI/redhat/grub.cfg

finally, restart the machine and check whether the machine booting using old kernel.

reference: Red Hat Document