Migration

In this post gonna explain what is migration, types and steps to be followed in migration.

What is Migration?

Migration is used to move the Data/Storage/Server/ from one to another (Server/Storage)

Pre-Requests:

  1. Hardware must be the same or updated one in Destination.
  2. Connectivity should be established between the source and destination.
  3. Tools for Operating System related migrations.

Migration types:

  1. DR Functionality
  2. Forklift

III. MSP Oracle

  1. Storage, Oracle (Storage/ggate)
  2. V2V (LPAR), V2V (VM), V2V (VPAR), V2V (Clone VM)
  3. P2V, P2V (VM), P2V (LPAR), P2V (NPAR) , P2P

VII. Seed-n-Swing (Physical), Seed-n-Swing (VM)

Steps involved in Migration:

  1. Data gathering
  2. Building a New server
  3. Post Provisioning
  4. Start Migration
  5. Decommissioning

Data gathering:

As per my knowledge, I have some details which we need to check from the old server. Details are below Server Name,Building Name,Source DC,Target DC,Migration Method,Environment,Server Status in Tool,HW Server Vendor,Operating System,OS Version,Model of Server,NFS,No of Physical CPUs,No of Cores per CPU,Memory (GB),Number of Physical NICs in Use,NIC Teamed,Data NIC IP address,Data NIC subnet mask,Data NIC gateway,Data NIC MAC Address,Other NIC Ips,DNS Servers in order,Boot From SAN?,VG Name,Free space in VG,LV,No of LUNs,Total External Storage in GB,SAN type seen by Powerpath,Connected HBA WWN,Disconnected HBA WWN,Is HP DDMI Agent Running?,Last reboot – uptime,Forsee any issue in the mig method, based on SAN/Network,Lun counts,Storage type,Array_id,Total Size,Internal Disk size.

Building a New server:

We have to create a new server for migration based on Migration types and keep in mind the date which we gathered from old server. Example: No need of new server like Forklift migrations

Post provisioning:

Once the server build has completed, have to perform below post build tasks

Be compliance in DNS entries and hosts file entries (/etc/hosts), NTP Server Configured or not, Backup is done if it’s necessary, etc… Based on the Data gathering.

We have to vulnerability scan and fix the security patch errors (FAIL’s and WARNING’s) which will be present in the new servers.

Migration:

  1. Create the file systems in new server based on old server with same VG, LV and PV name and size.
  2. Copy the boot file system from source to Destination Server. Need to do manual copy from source to destination server in Linux Server’s like Red hat. Will use tools to take image in AIX, etc…
  3. Have to do rsync the Data filesystem from source to Destination.
  4. Move the LUN’s to the target server if it’s applicable.
  5. Copy the applications from old to target server.
  6. Set the IP Address, DNS and other stuffs based on the Data gathering.
  7. Get the server in live once all these stuffs completed.

Decommissioning the old server:

  1. Check what are all the jobs and applications running and get the help from concern team to stop the running applications.
  2. Temporarily disable the backup, Mail, triggers, Disconnect the Database, Disable the NIC (Ethernet).
  3. Wait for some days without shutting down the server to confirm whether we are getting any call back from any team for any issue in new server.
  4. If we don’t hear any issues then will go ahead with disabling backup, mail, Triggers, Database, Network permanently.
  5. And then will turn of the server the Server and will remove the server from Rack.

Thanks for choosing the blog. Comments are welcome…

Multipathing in Linux

Multipathing is used for Load Balancing, path failover & Recover for block devices in Linux.

Load balancing:

The workload is distributed across the available hardware components.

Path failover & Recover:

Will use redundant I/O channels to redirect the read and write operations when one or more paths no longer available.

Prerequisites RPM’s:

  1. device-mapper-1.02.77-9.el6.x86_64
  2. device-mapper-multipath-libs-0.4.9-64.0.1.el6.x86_64
  3. device-mapper-multipath-0.4.9-64.0.1.el6.x86_64

Daemon: Multipathd

Configuration file: /etc/multipath.conf

The “multipath.conf” has five sections:

  1. System level defaults
  2. Blacklisted devices
  3. Blacklist exceptions
  4. Storage controller specific settings
  5. Device specific settings

Simple steps to configure multipath:

  1. For configuring the Multipath in Redhat Linux, device-mapper-multipath should be installed. You can verify It by using below command that it is installed or not:

#rpm -q device-mapper*

  1. If it is not installed, install it by using below command.

#yum install device-mapper

  1. After installation, start to configure multipath

#cd /etc

#mv multipath.conf multipath.conf.dist

#sed ‘/^#/d; /^$/d’ multipath.conf.dist > multipath.conf

#vi multipath.conf

Change to blacklist local hard drive only,

blacklist {
devnode “sda”
}

  1. Now start the Multipath service

#Service Multipathd start
#chkconfig Multipathd on

  1. Now Verify the disk paths

#fdisk -l
#sfdisk –s

Commands:


#service Multipathd start – to start the multipath service

#service Multipathd stop – to stop the multipath service

#service Multipathd reload – To update the modified configurations to replicate without restarting the service.

#multipath –ll – To list all the multipathed devices

#multipath –F – to stop the multipath

How to check listening ports in Linux

We should pay attention to listening ports, to validate and disable the unused ports in infra is a very important thing. In that the way, we can secure the server from the attack surface. So, Will see How to check listening ports in Linux

Known Ports:

993    – IMAPS
1194  – openVPN
1812  – RADIUS
995    – POP3s
2049  – NFS (nfsd, rpc.nfsd, rpc, portmap)
2401  – CVS server
3306  – MySql
3690  – SVN
6000-6063- X11
123    – NTP (Network time protocol used for time syncing uses UDP protocol)
137    – NetBIOS (nmbd)
139    – SMB-Samba (smbd)
143    – IMAP
161    – SNMP (For network monitoring)
389    – LDAP (For centralized administration)
443    – HTTPS (HTTP+SSL for secure web access)
514    – Syslogd (udp port)
636    – ldaps (both ctp and udp)
873    – rsync
989    – FTPS-data
990    – FTPS
20      – FTP Data (For transferring FTP data)
21      – FTP Control (For starting FTP connection)
22      – SSH (For secure remote administration which uses SSL to encrypt the transmission)
23      – Telnet (For insecure remote administration)
25      – SMTP (Mail Transfer Agent for e-mail server such as SEND mail)
53      – DNS (Special service which uses both TCP and UDP)
67      – Bootp
68      – DHCP
69      – TFTP (Trivial file transfer protocol uses udp protocol for connection less transmission of data)
80      –  HTTP/WWW(Apache)
88      – Kerberos
110    – POP3 (Mail delivery Agent)


Issue the below command as root user to check the listening ports.

Will use  netstat command to check open ports.

#netstat -tulpn

t – Will enables listing of tcp ports.
u – Will enables listing of udp ports
n – this will shows the port numbers
l – It will list only listening pockets

We should pay attention to listening ports, to validate and disable the unused ports in infra is a very important thing. In that the way, we can secure the server from the attack surface. So, Will see How to check listening ports in Linux


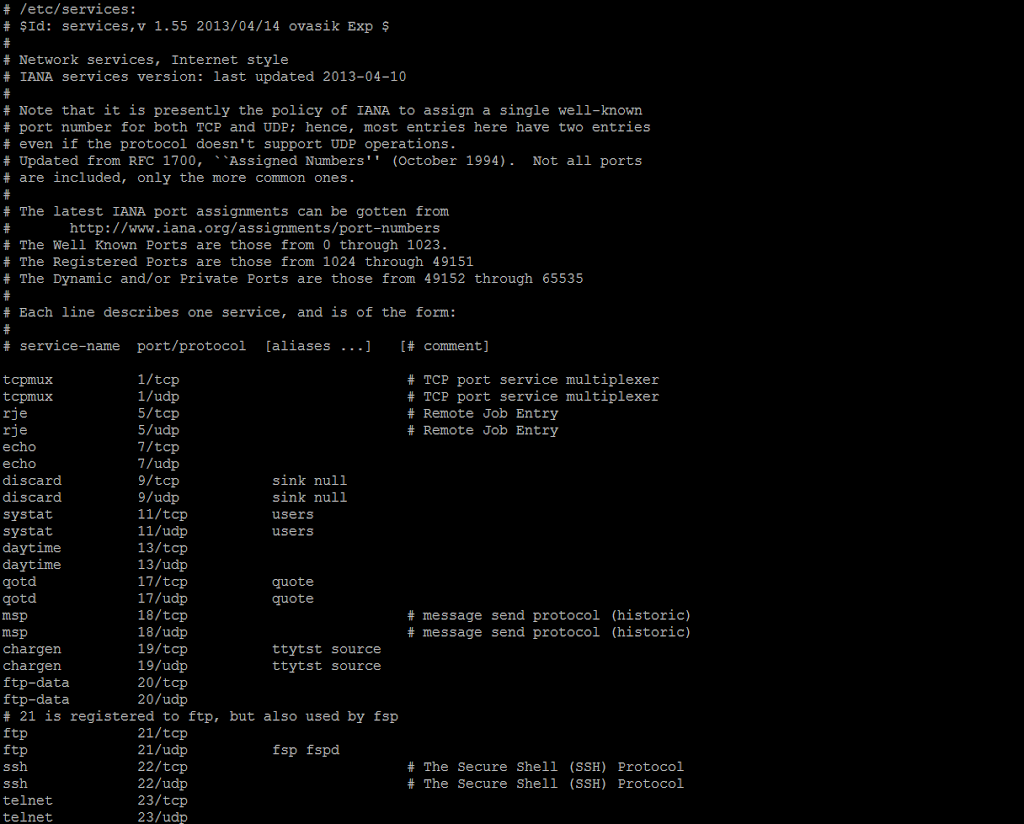
/etc/services – by reading this file we can read different types port/protocol combinations and applications.

#less /etc/services


lsof command:

Package for lsof:  lsof-4.87-4.el7.x86_64

To check the package avilability in linux use the below command.

#rpm -qa | grep -i lsof

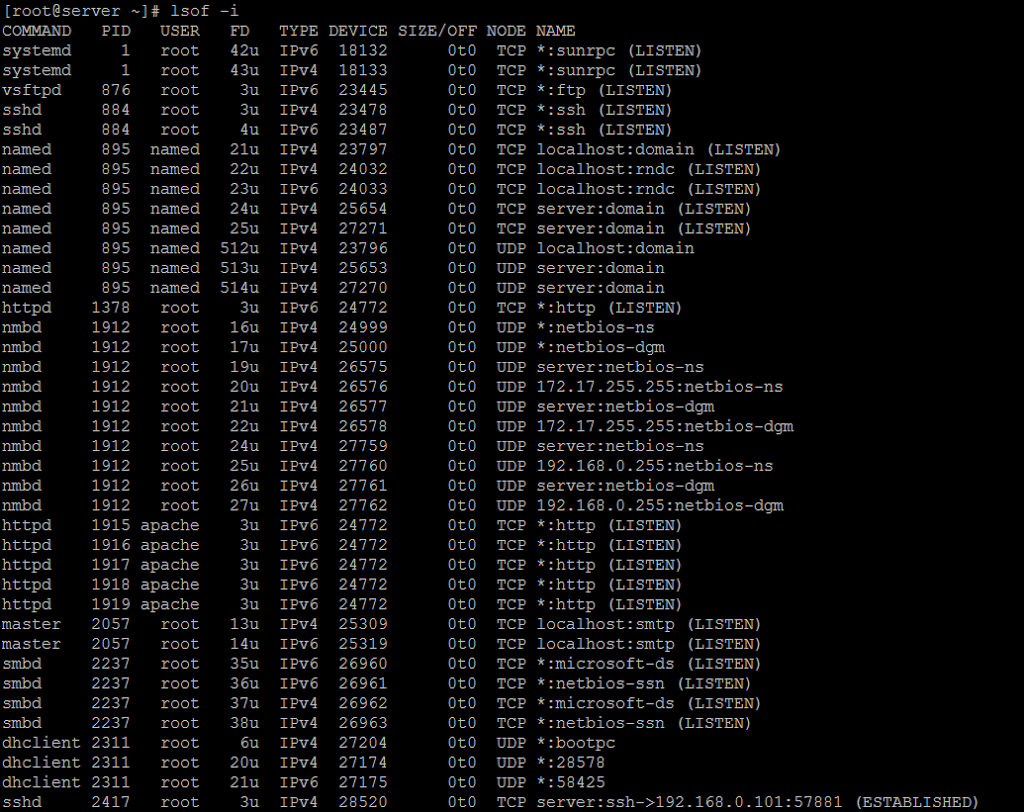
To list open ports:

#lsof -i


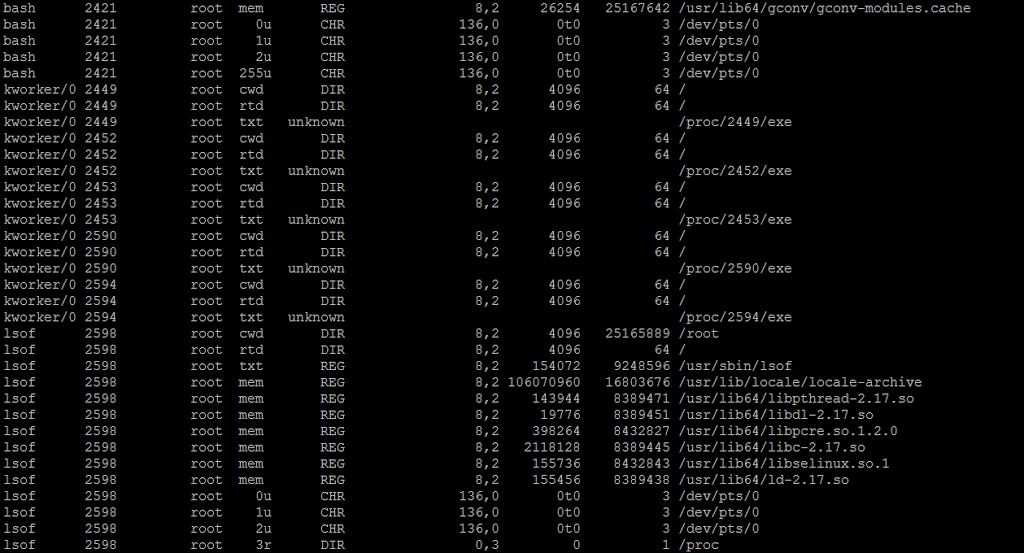
To display all open files:

nmap command:

    Using nmap  command will check the open ports for remote server.

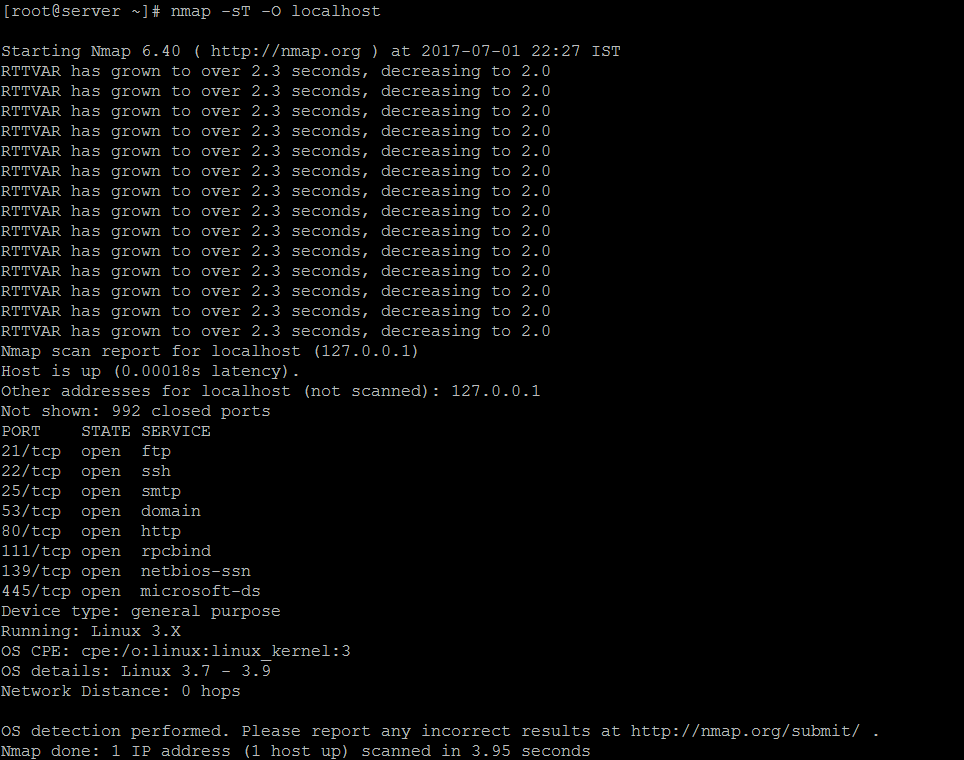
Using below command will check open ports in local machine.

      #nmap -sT  -O localhost


Command to check remote machine open ports:

#nmap -sT -O 192.168.0.105


Configuring SAMBA Server in RHEL7/ Cent OS 7

We are going to learn how to configure SAMBA Server in RHEL7 / Cent OS  7. Its used to share file and printer sharing over the network.

Now a days its used as Domain controller like Windows Active Directory.

Will integrate SAMBA Server with Windows Domain as a Primary domain controller or as a domain member.

Operating System:  RHEL7
Host Name:   server
IP Address:  192.168.43.226 / 255.255.255.0

Port numbers for Samba server :
137/tcp
137/udp
138/tcp
138/udp
139/tcp
139/udp
445/tcp
445/udp
Daemons:
  1. smbd: This is for file and printer sharing services
  2. nmbd:  This is for NetBIOS to IP Address service and Mapping NetBIOS Compluter Name to the TCP/IP IP Addresses.
Installing SAMBA Server:
 
#yum install y samba sambacommons cupslibs policycoreutilspython sambaclient
Below command will install all the packages which is required for samba server configuration.
 [root@server ~]# yum install -y samba
 
Create directory for sharing:
 
[root@server ~]# mkdir /sharedir
Create a new group called samba
 
#groupadd samba
 [root@server ~]# groupadd samba


change the group and permission for the directory which we are going to share using samba

[root@server ~]# chgrp -R samba /sharedir
[root@server ~]# chmod -R 777 /sharedir


check for the existing group and permission details for the directory.

[root@server ~]# ll / | grep sharedir
drwxrwxrwx. 2 root samba 6 Nov 11 08:59 sharedir
Now change the group and permission for the directory

Now again check for the group and permission for the directory and it’s changed.

Create a new user called test and add it to our newly created group which is called samba. Then set the samba password for the user.


[root@server ~]# useradd smbuser
[root@server ~]# usermod -G samba smbuser
[root@server ~]# smbpasswd -a smbuser
New SMB password:
Retype new SMB password:
Added user smbuser.
For samba default configuration file is /etc/samba/smb.conf 


We are going to edit this configuration file. Before that its advisable to take backup of configuration file.

#cp -p /etc/samba/smb.conf  /etc/samba/smb.conf.bkp


now we will edit the smb.conf file

[root@server ~]# vi /etc/samba/smb.conf
make the below entries at end of line.
Comment:   This will explain the operation what we are doing like sharing directory or sharing printer.
Path:           We are going to share a directory. So, here we should mention the directory with absolute path
Valid users:  Here we can mention the users and groups who has permission to access this directory.
Writeable:    i am giving yes, because i need read and write both permission.
browseable:  If you want to access the shared things using browser, we can make it as yes
Public:          We are not going to share this directory for all users. So, we should use no option.
[sharedir]
 comment = shared-directory
 path = /sharedir
 valid users = smbuser, @samba
 writeable = yes
 browseable = yes
 read only = no
 inherit acls = Yes

In the same smb.conf  file we should add our interface name and IP Address to allow the network in samba server.

And one more entry is very important that we need to mention our windows machines workgroup name. First we will use default one. If the windows machines are falling under different workgroup name. Then we have to change the workgroup name in this configuration file.

WORKGROUP  =  MYGROUP

We can add the services in /etc/services file.


[root@server ~]# vi /etc/services
netbios-ns 137/tcp # netbios name service
netbios-ns 137/udp # netbios name service
netbios-dgm 138/tcp # netbios datagram service
netbios-dgm 138/udp # netbios datagram service
netbios-ssn 139/tcp # netbios session service
netbios-ssn 139/udp # netbios session service


Now start the samba service and enable the service permanently on this run level.

[root@server ~]# systemctl start smb.service
[root@server ~]# systemctl enable smb.service
Created symlink from /etc/systemd/system/multi-user.target.wants/smb.service to /usr/lib/systemd/system/smb.service.

Same like that start and enable nmb service.

#systemctl start nmb.service
#systemctl enable nmb.service


 Add the firewall rule to allow the samba service via firewall.
In RHEL 7 firewall has been shipped from iptables to firewalld.

[root@server ~]# systemctl start firewalld
[root@server ~]# firewall-cmd --permanent --add-rich-rule='rule family="ipv4" source address="192.168.56.0/24" service name="samba" log prefix="samba" level="info" limit value="1/m" accept'
success
[root@server ~]# systemctl enable firewalld Created symlink from /etc/systemd/system/dbus-org.fedoraproject.FirewallD1.service to /usr/lib/systemd/system/firewalld.service.
Created symlink from /etc/systemd/system/basic.target.wants/firewalld.service to /usr/lib/systemd/system/firewalld.service.


Then reload the firewall configuration using below command

[root@server ~]# firewall-cmd --reload
success

Now all the configuration has been completed and will check in windows machine whether the samba is working well or not.

Connecting SAMBA server from linux  client machine.

samba client should be installed in linux client machine.

Package: samba-client-4.4.4-9.el7.x86_64

#yum install samba-client*

[root@server ~]# smbclient -L 192.168.43.126 -U test


-L :    This option will list the shared directories
192.168.43.226 :  IP Address of samba server
-U :  Option to mention the user name next to this which has access to this shared directory.

Output should be like below

Accessing via samba console:

#smbclient //192.168.43.226/sharedir -U test

above command will help you to show the content of shared directory and to do operations over their.


We successfully configure SAMBA server. Thanks for the support. 


Configuring DHCP Server in RHEL7/ Cent OS 7

DHCP – Dynamic host configuration protocol

We are going to configure DHCP Server in RHEL7

It’s a network protocol used to assign IP’s to the client dynamically over the network.

DHCP Workflow:

Required Package installation:

#yum install dhcp

Now we should assign a insterface in DHCPDARGS in /etc/sysconfig/dhcpd

 [root@localhost ~]# vi /etc/sysconfig/dhcpd
 
  DHCPDARGS=enp0s3

After installing package it will create one empty configuration file /etc/dhcp/dhcpd.conf  and we have one sample configuration file under /usr/share/doc/dhcp-4.2.15/dhcpd.conf.exmaple.

So as first, append the content from example file to original file using cat command.

[root@localhost ~]# cat /usr/share/doc/dhcp-4.2.5/dhcpd.conf.example >> /etc/dhcp/dhcpd.conf

Open the configuration file to configure DHCP Server:

First will give basic configuration which will be common for your network.

[root@localhost ~]# vi /etc/dhcp/dhcpd.conf


Make the below entries 

 option domain-name "lbcdomain.com";
 option domain-name-servers server.lbcdomain.com;
 default-lease-time 600;
 max-lease-time 7200;
 authoritative;
 log-facility local7;


Now make subnet details in same configuration file.

subnet 192.168.1.0 netmask 255.255.255.0 {
 option routers 192.168.1.254;
 option subnet-mask 255.255.255.0;
 option domain-search "lbcdomain.com";
 option domain-name-servers 192.168.1.1;
 option time-offset -18000; # Eastern Standard Time
 range 192.168.1.10 192.168.1.100;
}

Optional(To reserve IP for a dhcp client machine) :

If you wan to assign a static IP to a client using DHCP service, use the below command.

host station1 {
 option host-name "node11.lbcdomain.com";
 hardware ethernet 00:12:2A:2B:3C:AB;
 fixed-address 192.168.1.100;
}

Restart the dhcp service now to complete the DHCP server configuration.

[root@localhost ~]# systemctl restart dhcp
To check dhcp we should login in client machine which is in same network physically and edit the interface configuration file to make dhcp ip assigned.
#vi /etc/sysconfig/network-scripts/ifcfg-eth0
 change the entry for BOOTPROTO as dhcp

DEVICE=eth0

BOOTPROTO=dhcp

TYPE=Ethernet

ONBOOT=yes
 
Save and quit.
 
Now restart the network service.
 #service network restart
 
now check for the ip and it should be assigned in between 192. 168.1.50 to 192.168.1.254
  
DHCP Configuration has been done.
Do practice well. All the best.

Working with firewalld in RHEL 7/ Cent OS 7

            First we make sure the firewall service is running before going to do any work related to ports.

Use the command to check the firewall service status:

[root@server ~]# systemctl status firewalld
● firewalld.service - firewalld - dynamic firewall daemon
 Loaded: loaded (/usr/lib/systemd/system/firewalld.service; enabled; vendor preset: enabled)
 Active: active (running) since Sun 2017-10-29 08:46:09 IST; 4min 23s ago
 Docs: man:firewalld(1)
 Main PID: 523 (firewalld)
 CGroup: /system.slice/firewalld.service
 └─523 /usr/bin/python -Es /usr/sbin/firewalld --nofork --...

Oct 29 08:46:07 server systemd[1]: Starting firewalld - dynamic fir....
Oct 29 08:46:09 server systemd[1]: Started firewalld - dynamic fire....
Hint: Some lines were ellipsized, use -l to show in full.

Now we came to know that currently firewall is running and will check what are all the zone’s available and in public zone what are all the ports enabled/Listening, using below commands.

Command to check the available zone’s:


[root@server ~]# firewall-cmd --get-zones
work drop internal external trusted home dmz public block

Command to check the listening ports in public zone:


 [root@server ~]# firewall-cmd --zone=public --list-all
public (active)
 target: default
 icmp-block-inversion: no
 interfaces: enp0s8
 sources:
 services: dhcpv6-client mountd nfs rpc-bind ssh
 ports:
 protocols:
 masquerade: no
 forward-ports:
 sourceports:
 icmp-blocks:
 rich rules:
From the output we came to know that there are none ports enabled. So, will see how to enable a port.
For example i’m going to show you how to enable 8080(TCP Traffic) port.
[root@server ~]# firewall-cmd --zone=public --add-port=8080/tcp --permanent
success
 
–permanent:                 This is used to make the change permanent after rebooting the system.
–zone=public:               We are enabling the port in public zone.
–add-port=8080/tcp:    port number which we are going to enable.
We must reload the firewall configuration to make the changes effect in current session. However it will take the effect by next booting.
[root@server ~]# firewall-cmd --reload
success
Again will check for the enabled ports status in public zone after this changes.
[root@server ~]# firewall-cmd --zone=public --list-all
public (active)
 target: default
 icmp-block-inversion: no
 interfaces: enp0s8
 sources:
 services: dhcpv6-client mountd nfs rpc-bind ssh
 ports: 8080/tcp
 protocols:
 masquerade: no
 forward-ports:
 sourceports:
 icmp-blocks:
 rich rules:
It shows that 8080 port has been enabled.
I am going to show you how to remove the enabled port in firewall and as i said will reload the firewall configuration to make effect in this session. Then check for the status.
[root@server ~]# firewall-cmd --zone=public --remove-port=8080/tcp --permanent
success
[root@server ~]# firewall-cmd --reload
success
[root@server ~]# firewall-cmd --zone=public --list-all
public (active)
 target: default
 icmp-block-inversion: no
 interfaces: enp0s8
 sources:
 services: dhcpv6-client mountd nfs rpc-bind ssh
 ports:
 protocols:
 masquerade: no
 forward-ports:
 sourceports:
 icmp-blocks:
 rich rules:
 
We can get the list of zones where we have assigned interfaces and sources.
[root@server ~]# firewall-cmd --get-active-zone
external
 interfaces: enp0s3
public
 interfaces: enp0s8
To get the which zone is associate with a interface. Here i’m taking enp0s3 interface for test.
[root@server ~]# firewall-cmd --get-zone-of-interface=enp0s3
external

Command to get the permanent configuration of a zone. Here i’m taking public zone to test.

[root@server ~]# firewall-cmd --permanent --zone=public --list-all
public
 target: default
 icmp-block-inversion: no
 interfaces:
 sources:
 services: dhcpv6-client mountd nfs rpc-bind ssh
 ports:
 protocols:
 masquerade: no
 forward-ports:
 sourceports:
 icmp-blocks:
 rich rules:

Command to get the default zone:
[root@server ~]# firewall-cmd --get-default-zone
public

Command to set the default zone:
[root@server ~]# firewall-cmd --set-default-zone=home
success
 

Docker installation in RHEL7/ Cent OS 7

We are going to see Docker installation in RHEL7/ Cent OS 7.

Docker packages are available for RedHat Servers and RHEL Atomic Host editions alone not for other workstations or other variants of RHEL.

In this installation method internet is mandatory.

Docker installation using native docker script is straight forward method. Using “curl”  will install the docker.  Before installing docker, first check curl  package is installed on your system.

#curl –version

[root@localhost ~]# curl --version
curl 7.29.0 (x86_64-redhat-linux-gnu) libcurl/7.29.0 NSS/3.21 Basic ECC zlib/1.2.7 libidn/1.28 libssh2/1.4.3
Protocols: dict file ftp ftps gopher http https imap imaps ldap ldaps pop3 pop3s rtsp scp sftp smtp smtps telnet tftp
Features: AsynchDNS GSS-Negotiate IDN IPv6 Largefile NTLM NTLM_WB SSL libz unix-sockets
 Installing Docker using curl command
 
  Use the below command to install the docker.
 
#curl -SSL https://get.docker.com/ | sh
 
Now will enable the docker permanently in this runlevel and will start docker.
Command to enable the docker in this runlevel
#systemctl enable docker


Command to start the docker
#systemctl start docker
 
 
command to check the docker status
#systemctl status docker
 
 
Command to restart the docker
#systemctl restart docker


Docker has been installed and now will check the docker installation here.
#docker run hello-world


Will list the new containers with below command

#docker ps -a


DNS Configuration on RHEL7/ Cent OS 7

                 Domain Naming System is a naming convention for computers, which is connected to the internet. Its not possible to remember all the web server IP Address. So, here its comes as a resolution for this. Because, It will translate from the IP Address to Name and Name to IP Address.

We are going to see how to setup DNS in RHEL 7 and Cent OS 7.

Requirement:

Host Name: server.linuxbookcenter.com
IP Address: 192.168.43.226

Packages:
1. bind
2. bind-utils

Installing bind packages:

[root@server]# yum -y install bind*

BIND Configuring:

We are going to configure the “/etc/named.conf” file for BIND configuration.
open the file using vi editor and comment out two lines like shown below. This lines allow your DNS to listen all the IP Address.

Add your network by modifying “allow-query” line in the named.conf file to all the computers to do name transition which connected in this network

#vi /etc/named.conf

[root@server ~]# vi /etc/named.conf 

options {
 #listen-on port 53 { 127.0.0.1; };
 #listen-on-v6 port 53 { ::1; };

 directory "/var/named";
 dump-file "/var/named/data/cache_dump.db";
 statistics-file "/var/named/data/named_stats.txt";
 memstatistics-file "/var/named/data/named_mem_stats.txt";

 allow-query { localhost; 192.168.43.226/24;}; 

And the zone file information will be available in “/etc/named/rfc1912.zones” file by default. Here we should modify the entry based on our requirement.

Note: This entry contains the forward and reverse zone file names.

This file location included in “/etc/named.conf” file. Find the below screenshot.

Now save and exit from the “/etc/named.conf” file.

Provide zone file information entry:

edit the “/etc/named.rfc1912.zones”  file to provide the zone file information entries.

[root@server ~]# vi /etc/named.rfc1912.zones

And make the below entries or modify the existing one based on our requirement.


zone "localhost.localdomain" IN {
 type master;
 file "named.localhost";
 allow-update { none; };
};

zone "lbcdomain.com" IN {
 type master;
 file "fwd.lbcdomain.com.db";
 allow-update { none; };
};

zone "1.0.0.0.0.0.0.0.0.0.0.0.0.0.0.0.0.0.0.0.0.0.0.0.0.0.0.0.0.0.0.0.ip6.arpa" IN {
 type master;
 file "named.loopback";
 allow-update { none; };
};

zone "1.0.0.127.in-addr.arpa" IN {
 type master;
 file "named.loopback";
 allow-update { none; };
};

zone "226.43.168.192.in-addr.arpa" IN {
 type master;
 file "43.168.192.db";
 allow-update { none; };
};

Create and Configure the Zone files:

Default location for the zone file’s :  /var/named

create a forward zone file with “fwd.lbcdomain.com.db”   name.

[root@server named]# vi /var/named/fwd.lbcdomain.com.db
 Provide the below entries to complete the forward zone configuration.
keywords for Zone Files
A – A record
NS – Name Server
MX – Mail for Exchange
CN – Canonical Name

$TTL 86400
@ IN SOA server.lbcdomain.com. root.lbcdomain.com. (
                            20171129 ; serial
                            3600     ; refresh
                            1800 ; retry
                            604800 ; expire
                            86400 ) ; minimum
;Name server info
@ IN NS server.lbcdomain.com.

;Name server Ip info
server IN A 192.168.43.226

;Mail exchanger
lbcdomain.com. IN MX 10 mail.lbcdomain.com.

;A - Record Hostname to IP Address
www IN A 192.168.43.10
mail IN A 192.168.43.15

;CNAME Record
ftp IN CNAME www.lbcdomain.com.

Save and exit from the file and create reverse zone file with the name of “43.168.192.db”

PTR – Pointer

SOA – Start of Authority

[root@server ~]# vi /var/named/43.168.192.db
make the below entries in reverse zone file like below.
$TTL 86400
@ IN SOA server.lbcdomain.com. root.lbcdomain.com. (
                        20171129 ; serial
                        3600 ; refresh
                        1800 ; retry
                        604800 ; expire
                        86400 ) ; minimum

;Name server info
@ IN NS server.lbcdomain.com.

;Reverse lookup info
226 IN PTR server.lbcdomain.com.

;PTR Record for IP to Hostname
10 IN PTR www.lbcdomain.com.
15 IN PTR mail.lbcdomain.com.

Save and exit from the file.

We completed all the configuration and we should restart the bind service.

[root@server ~]# systemctl restart named

Make it enabled in system startup.

[root@server ~]# systemctl enable named
Now login in any client system which is already connected in same network and make DNS entries in
/etc/resolv.conf  file like below.
#vi /etc/resov.conf
Save and exit from the file and if  NM is managing the network, make DNS entry in /etc/sysconfig/network-scripts/ifcfg-eth0
 
 
Note: In my infra i took this network adapter configuration file for this ifcfg-eth0. This might vary in your systems.
 
#vi /etc/sysconfig/network-scripts/ifcfg-eth0


Save and exit after making the entry and restart the network service.
#service network restart
 
Will check the DNS connection from the client to DNS servers using dig command. Use the below command to check forward lookup
#dig www.lbcomain.com
Will receive the below output if working good.
Check in reverse from IP to Hostname to confirm whether the reverse lookup is working fine not.
#dig -x 192.168.43.226

Output:

We completely done on DNS configuration now:)

Changing/ Recovering root user password in RHEL7/ Cent OS 7

We are going to see How to Changing/ Recovering root user password in RHEL7/ CentOS 7 in this post

Boot the system and wait for GRUB menu. On some Operating systems, you need to disturb the booting by pressing any keys in your system.

Changing/ Recovering root user password in RHEL7/ Cent OS 7
Highlight the first line which is pointing the Operating System entry like showed in the above image and press “e” key in your keyboard to edit manually.
Then will get the below screen.
Using up/down, left/right arrow keys move the cursor to the “rhgb quiet” which is in kernel line starting with “linux16”
Using delete/backspace keys manually delete “rhgb quiet” entry and append “init=/bin/bash” entry like below.

Than press Ctrl+x  to reboot your OS with specified option. Once rebooted, will get a shell prompt without credentials.

check whether the root filesystem has been mounted or not.

Mount the root filesystem with RW permission.

Now issue the “passwd” command to recover/change the root password. It will ask for the new password and re-enter the password for confirmation. Once provided the new password will receive the “Authentication token successfully updated”

Relabel the SELinux content using below command.
Restart the machine using the below command.
Finally, we recovered the root password. Now will restart the machine and login with a new root password.

Changing hostname in RHEL7 / CentoS 7

Hostname is like labeling for Computers/ Other devices which is connected in internet/network.
hostname is used to identify/access the computers/devices easily in network.

Will see how to check and change the hostname in RHEL 7/ Cent OS 7

Using “hostname” command will check the existing hostname.

nmtui:

Will use this Network managet tool to set the hostname and it will edit the “/etc/hostname” in background.

Now the hostname has been changed  from “localhost.localdomain” to “server.localdomain” and by  issueing “hostname” command will check whether the change has been implemented or not. If the hostname still shows the “localhost.localdomain” old one, we should restart the hostnamed to force the change in hostnamectl.
Will check the hostname now.
Successfully hostname has been changed.